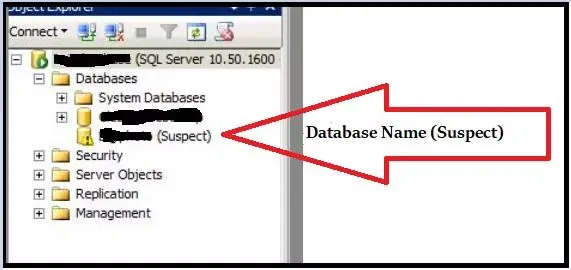
Sometimes because of some reason when you connect to your SQL server instance, you may find that your database being marked as Suspected (Database Name (Suspected)). Here in this blog, we are going to discuss how to bring the Microsoft SQL database suspect mode to normal mode in SQL server.
Databases Recovery from Suspect Mode in SQL Server
 |
| SQL Server Suspect Database |
Getting Started
If you find that your database in suspect mode, then you may get error “database cannot be opened it has been marked suspect by recovery” while executing query.
Nothing to worry there is solution inside the Microsoft SQL Server. We can bring the SQL database suspect mode to normal mode easily by following up some simple steps.
Nothing to worry there is solution inside the Microsoft SQL Server. We can bring the SQL database suspect mode to normal mode easily by following up some simple steps.
Reasons Of Suspect Mode
- Improper shut down of SQL Server System due to
- Sudden Power Outage
- SQL Server Database Operation Failures
- Database Files are inaccessible
- Database Files are inaccessible
- SQL Server Crash
- System Issues
- Hardware Failure
Solution
The solution is very simple, there are some easy steps which bring back the SQL database into normal mode. First you have to identify the database which gone into suspected mode. You can see the database in object explorer of Microsoft SQL Server Management Studio (SSMS) or you can list out the SQL Databases using the below database suspect query.
SELECT NAME, STATE_DESC FROM SYS.DATABASES WHERE STATE_DESC='SUSPECT'
Database Suspect Query
Steps of Database Recovery From Suspect Mode
- Open SQL Server Management Studio and connect to SQL server instance.
- Click the New Query button and select the master database.
- Or execute the below query to select the master database.
USE master - Now we will bring the database/ SQL databases into emergency mode using the below query, because in suspect mode the SQL server will not allow to connect the database in suspect mode. Replace the "Your_Database_Name" with your database name.
ALTER DATABASE Your_Database_Name SET EMERGENCY - Copy the below query and past it in new query window, the query will check the logical and physical integrity of all the objects of database.
DBCC CHECKDB (Your_Database_Name) - Next step is to alter the database and bring it in SINGLE_USER mode by executing the below TSQL query. Copy and execute the query.
ALTER DATABASE Your_Database_Name SET SINGLE_USER WITH ROLLBACK IMMEDIATE - The next step is to repair the database, copy the below query and paste it in new query window then execute it. Note that some data may occur.
DBCC CHECKDB (Your_Database_Name, REPAIR_ALLOW_DATA_LOSS) - The final step is to give the SQL Server database MULTI_USER access. Use the below query to give the database MULTI_USER access.
ALTER DATABASE Your_Database_Name SET MULTI_USER
Note: -
- DBCC CHECKDB will take time depending upon the size of the database.
- When database is repaired using REPAIR_ALLOW_DATA_LOSS option of DBCC CHECKDB command there can be some loss of data.
- Once the database is successfully repaired using REPAIR_ALLOW_DATA_LOSS option of DBCC CHECKDB command then there is no way to go back to the previous state.
Related Articles
- Create User In SQL Server Management Studio
- SQL Sever Firewall Ports
- SQL Server Shrink Log File
- Shrink Database (SQL Server)
- Create A Database in SQL Server
Thanks

thanks for sharing, helped me to recover my database from suspect mode
ReplyDelete